🛈 Only organization owners and admins can set up notifications.
It would be tedious to monitor every test in your ongoing test operations. Instead, you can configure k6 Cloud to send notifications whenever a significant test event happens. For example, you could send a notification whenever a test unexpectedly aborts or fails a check or threshold.
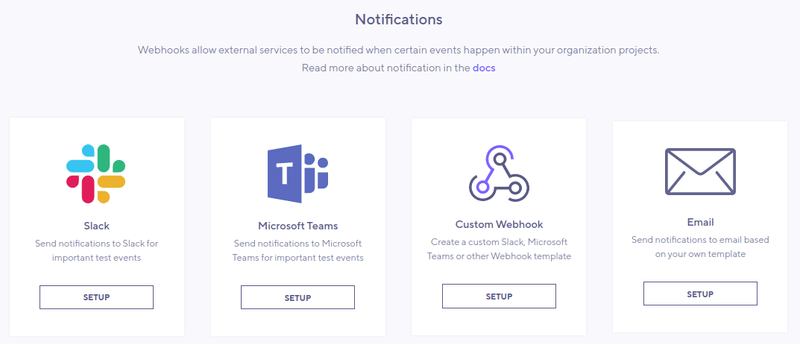
k6 supports the following ways to send notifications:
- To a third-party platform, like workspaces for Slack and Microsoft teams
- Through a custom webhooks
- Through email
When you schedule a test or add it to your continuous integration pipeline, you'll likely want to configure a notification for failed events, thus automating test execution and observation.

Add a Slack notification
To send notifications to Slack, follow these steps.
- From Slack, add a Custom Integration and select Incoming WebHook app.
- Select or create a channel and copy Slack's generated WebHook URL.
Then, head to the k6 web app.
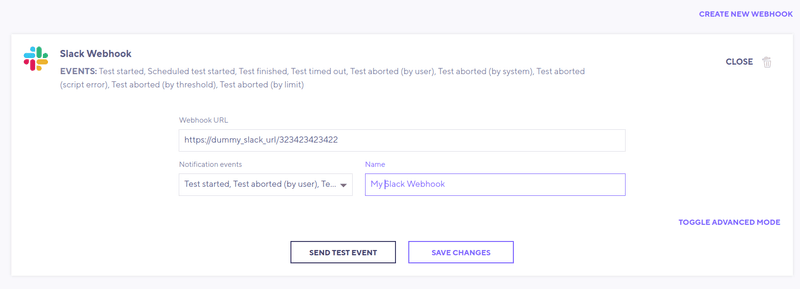
From the sidebar, select Notifications, then select Slack.
Paste the Slack WebHook URL into the Webhook URL input field.
From the Notification event dropdown, choose the events that will trigger notifications or select all. Refer to the supported notification events.
Optionally, give your notification a name (in case you want more than one Slack integration).
Save.
If you now go back to Configure the notification you just created, you'll see a Send test event button. Use that to send a dummy message and to make sure it works.
With the toggle advanced mode button, you can view and customize exactly what k6 sends to Slack. Read more about it in the Custom webhook section below.
Add a Microsoft Teams notification
First, figure out the webhook URL for your Microsoft Team setup. Then go the k6 web app and follow these steps.
From the k6 web app, select Notifications from the left menu bar. From there, select Microsoft Teams.
Paste the Teams URL into the Webhook URL input field.
From the Notification event dropdown, pick the events you want to be notified by, or all of them. Refer to the supported notification events.
Optionally, give your notification a name (in case you want more than one Teams integration).
Save.
If you now go back to Configure the notification you just created, you'll see a Send test event button. Use that to send a dummy message and make sure it works.
To view and customize exactly what k6 sends to Microsoft Teams, use the Advanced mode toggle. Read more about it in the Custom webhook section below.
Add a Custom Webhook
While k6 offers defaults for Slack and Microsoft Teams, you can send to any third-party service with a webhook integration. You can customize the JSON payload directly in the k6 app.
First, get the webhook URL of your service of choice. If experimenting, you might first try a free online service that provides temporary URLs for webhook debugging, like webhook.site.
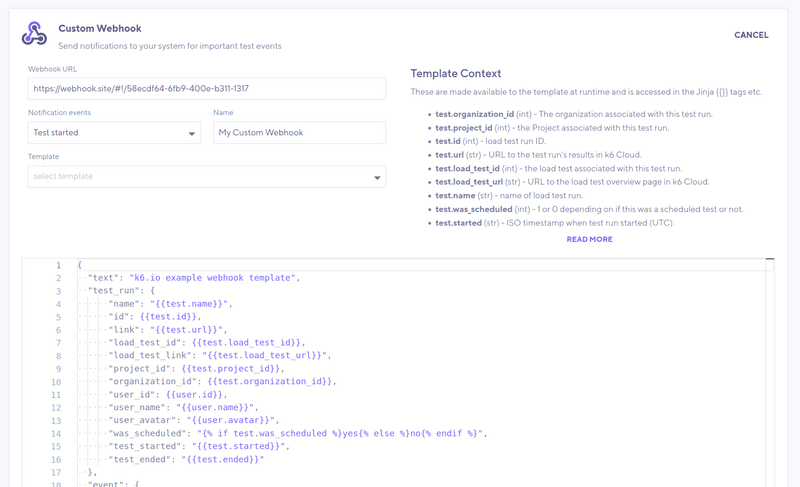
From the k6 web app, select Notifications from the left menu bar. From there, select Custom Webhook.
Add your URL in the Webhook URL input field.
From the Notification event dropdown, pick the events you want to be notified by, or all of them. Refer to the supported notification events. You can find descriptions of the available events below.
Optionally, give your notification a name to separate different hooks.
Optionally, select a Template to start from. The Generic Template showcases all the possible values k6 can send. The Slack/Microsoft Teams templates are the same ones you can customize when you send webhooks to those services.
Modify the JSON payload as needed. Refer to Template context variables as needed.
Save and fix any eventual errors reported.
After you save, select the notification you just created. Then test your webhook with the Send test event. k6 will fill all the context fields in your template with mock values.
Fix any errors reported by sending the test event. Double-check that each field's value is what you expect.
Add a Custom Email notification
Instead of using webhooks, you can have k6.io send you an email. First, decide which email addresses will receive the notification. Then, follow these steps.
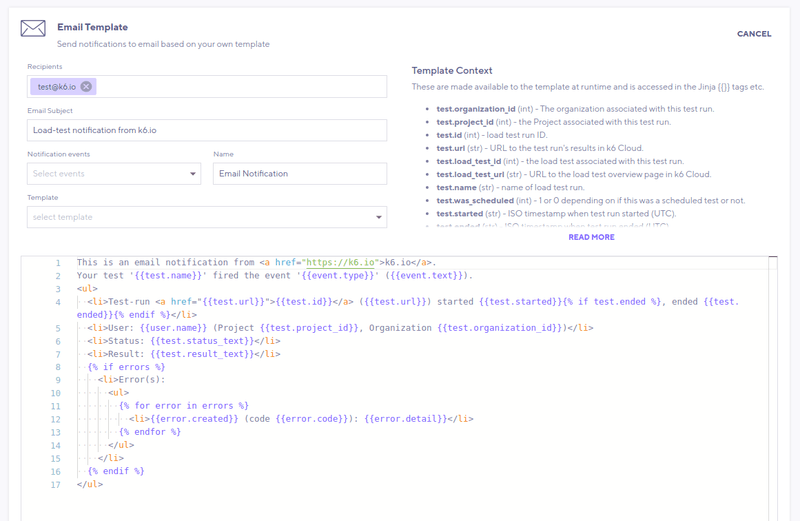
From the k6 web app, select Notifications from the left menu bar. From there, select Email.
In the Recipients field, select your organization's member emails from the dropdown, or enter the email addresses that should receive the notification. Use commas or spaces to separate emails.
Enter an email Subject. This helps filter and organize notifications in your email program.
From the Notification event dropdown, choose the events you want to be notified about, or select all. Refer to Supported notification events.
Optionally, give your notification a name to separate different notifications.
Optionally, select a Template to start from. The default Email notification is a simple HTML-enhanced email template with human-readable test results. You can edit this to your liking.
Save and fix any reported errors.
After you save, open the webhook and test it with the Send test event button. This sends a dummy message to your email address/addresses. k6 will fill the context fields in your template with mock values.
Fix any errors reported by sending the test event. Double-check that value for each field is what you expect.
Supported Notification events
Broadly, two types of events trigger notifications:
- When a test run starts
- When a test run ends
Within these categories, you can granularly configure which events trigger notifications.
Events when a test starts
| Event name | Identifier | Description |
|---|---|---|
| Test started | test.started.manual | Only tests started manually |
| Scheduled test started | test.started.scheduled | Only tests that were scheduled |
Events when a test ends
| Event name | Identifier | Description |
|---|---|---|
| Test finished | test.finished.finished | All tests that ends with a Finished run status |
| Test finished successfully | test.finished.success | Only tests that pass (all thresholds must pass too) |
| Test failed | test.finished.failed | Only tests that fail their thresholds |
| Test timed out | test.finished.timed_out | Only tests that timed out in some way due to an upstream issue |
| Test aborted (by user) | test.finished.aborted_user | Only tests that were aborted manually by a user |
| Test aborted (by system) | test.finished.aborted_system | Only tests that were aborted due to some upstream system problem |
| Test aborted (script error) | test.finished.aborted_script_error | Only tests that were aborted due to a test-script error |
| Test aborted (by threshold) | test.finished.aborted_threshold | Only tests that were aborted by crossing a test threshold |
| Test aborted (by limit) | test.finished.aborted_limit | Only tests that were aborted due to hitting an execution or network limit |
You can safely pick multiple options and get at most get two notifications per test-run, one when it starts and one when it ends. k6 passes the event identifier along to specify which condition triggered the notification.
Templating syntax
The notification templates use the Jinja2 templating language. Jinja uses {{ }} to mark places in the template that will be replaced by actual values when the notification is created.
For example, let's say we want to include the test name and identifier in our context.
From the Template Context list, note that these variables are accessed as test.name and test.id. Here's what we need to add to the template:
Jinja also supports simple if/else conditionals. Write conditionals in the form:
Here is an example (from the generic template) of setting a color based on the result of the test-run:
Jinja also allows for for-loops.
This example loops over the list of errors (if any):
The loop.last is a special Jinja feature. Here it used in place of a comma after the last item (a comma at the end would not be valid JSON).
Remember that after the Jinja-parsing/replacing, the result must be a valid JSON structure. So in the examples above, note how we can leave the test.id as-is (since it's an int), but because the test.name is a string, it must be enclosed in quotes " ... ". In the same way, the for-loop output must be created inside [ ... ] to have the result be a proper JSON array.
Template Context variables
You can use these variables in your notification templates.
To access them as expressions, use the default {{ }} delimiters. Note the type of each value and especially remember to put double quotes around strings, so the result after template-replacement is still valid JSON.
test
This holds test-run data for the test run that triggered the event.
| Variable | Type | Description |
|---|---|---|
| test.organization_id | int | The organization associated with this test-run |
| test.project_id | int | The project associated with this test-run |
| test.id | int | The test-run ID |
| test.url | str | A link to the test-run result data in the K6 cloud app |
| test.load_test_id | int | The test associated with this test-run |
| test.load_test_url | str | A link to the test's page in the k6 cloud app |
| test.name | str | The name of this test |
| test.was_scheduled | int | 1 or 0 depending on if this was a scheduled test or not |
| test.started | str | ISO time stamp for when test-run started (GMT) |
| test.ended | str | ISO time stamp for when test-run ended (GMT) |
| test.status | int | The run-status code of the test |
| test.status_text | str | Run-status as human-readable text ("Finished", "Timed out" etc) |
| test.result | int | Is 0 if passed, 1 if failed |
| test.result_text | str | Result as text ("Passed"/"Failed") |
user
Information about the user associated with this test-run.
| Variable | Type | Description |
|---|---|---|
| user.id | int | The user starting this test-run |
| user.name | str | The full name of the user (first and last name, if available) |
| user.avatar | str | A gravatar link, needed for example for Slack integration |
event
Details about the event itself.
| Variable | Type | Description |
|---|---|---|
| event.id | str | Unique hash for this event |
| event.type | str | This is the event trigger type that fired, like "test.finished.all". If no event is specified, will be the string <any> |
| event.text | str | This is a more readable description of the event type, like "Test finished running". If event.type is <any>, this will be "Unknown" |
errors
An array of error objects attached to this test run (if any).
| Variable | Type | Description |
|---|---|---|
| errors | array | Holds all errors |
If looping over this array (let's call the loop variable error), each item in the list has the following properties:
| Variable | Type | Description |
|---|---|---|
| error.code | int | An internal error code only useful when reporting a problem to us |
| error.created | str | ISO string with the time the error was triggered |
| error.detail | str | A short description of the error |
Notification message format
When an event is triggered, k6 Cloud sends a POST request to the configured URL.
Headers sent with all requests:
| Header | Description |
|---|---|
| X-k6cloud-ID | Unique ID for this request |
| X-k6cloud-Event | Name of the event, like "test.ended" |
| User-Agent | Always "K6CloudWebHook" |
Header Example:
The body of the request is a JSON structure created by populating the chosen notification template with values relevant to the event.


