This post was originally written by Enes Kühn in medium.com.
Load testing, which is as a type of non-functional testing that puts a structure or system under pressure and measures its response, might sound boring. In reality the entire process of planning, estimating, and implementing load tests against the system is like putting together pieces of a complex puzzle, and it can be a lot of fun.
The planning process may be the trickiest part because we need to think of real-life scenarios and not just guess the number of (virtual) users we want to simulate. An important part of the planning process is to look at the Gaussian (a.k.a. normal) curve and not forget that even if thousands of users are using our application, what is the probability of several users clicking on the same button (hitting the same endpoint/resource) at the same time counted in milliseconds?
Did I just say load testing was fun but then went all into math and probability and blah blah blah? How boring. (It really isn’t though!)
Resource Object Model to the rescue
I was recently assigned to a very dynamic large-scale project where we utilized k6 to test multiple non-functional aspects such as:
- load, performance, spike, and endurance testing
- infrastructure horizontal scalability testing
- Amazon CloudWatch alarms test
- database locks test
- Prometheus monitoring test
All the tests were executed against real, production-like environments in various regions. The project required quick and efficient test adoption where the backend was constantly in a state of improvement and optimization. Having multiple test scripts created per scenario, region, or test executor was simply impossible to maintain.
To accomplish this and run tests with 15,000+ virtual users from a single machine, I utilized Resource Object Model. It turned out to be the perfect fit with minimal resource consumption.
Tackling extreme pressure scenarios
If we skip some parts of the planning process, all we need is a powerful tool that can translate our idea of putting our endpoints under extreme pressure. Extreme pressure could be 10,000 users hitting the same endpoint at the same time or with a short step increase. One tool on the market really stands out in terms of simplicity and number of (virtual) users that we can generate on our workstations, and that’s the one and only Grafana k6.
Grafana k6 is an open-source load testing tool that makes performance testing easy and productive for engineering teams. k6 is free, developer-centric, and extensible.
Using k6, you can test the reliability and performance of your systems and catch performance regressions and problems earlier. k6 will help you to build resilient and performant applications that scale.
k6 is developed by Grafana Labs and the community.
Show me how to put pressure on the system!
K6 Open Source has awesome documentation and how-to guides on their site. I personally followed them and managed to create my first load test within a day, simulating 10,000 virtual users.
Let’s use the publicly available Rick and Morty API to demonstrate what the load test looks like.
noteI’m only using the Rick and Morty API for demo purposes, and I did not execute the script below. Do not put it under extreme load because the site/endpoint is not created for that purpose!
The entire test script looks straightforward. For the most part, we’re sending a request, verifying the response HTTP code, and sleeping for a second. If we want to add another test, we would just create a new script as a copy of the existing one, modify the API endpoints and voila — we have a new test. Sounds awesome and super simple. However, what would happen if the development team made some changes at the backend? The scripts will fail, for sure, and we would need to make changes directly in test files. Even worse, there are some API resources that are used within multiple test scripts — we would need to make exact same change on multiple test scripts.
Implementing Resource Object Model pattern
For me, coming from the automation testing world, the very first thing that came to my mind was to try to implement some sort of Page Object Model (POM) pattern, a.k.a. Resource Object Model (ROM), on my load testing project. I know that it’s most likely an anti-pattern rather than real pattern, but my brain is telling me to do it. I always aim to have a single source of truth, one place for all the maintenance work and tests scripts built just like Lego out of previously created objects. It may be that the Resource Object Model slightly affects test performance, but I prefer DRY KISS (Do Not Repeat Yourself & Keep It Short and Simple) over complexity.
Build a strong foundation
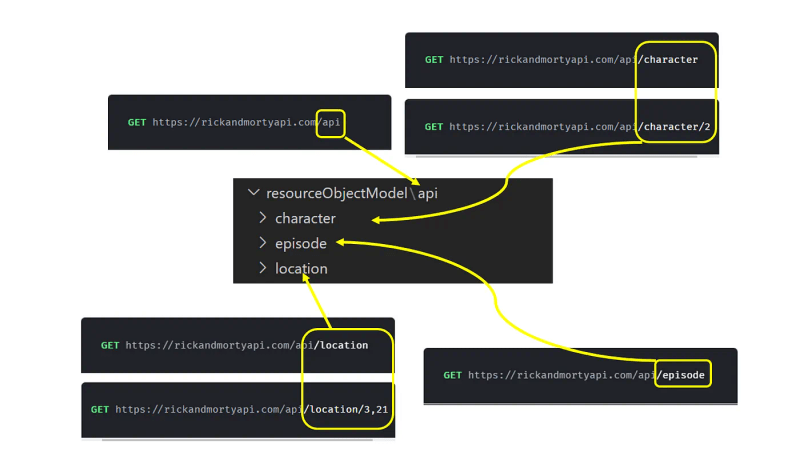
The idea of building a strong project foundation relies on having a clean project folder/file/class structure. Let’s create the same folder structure as in our API documentation:
Also, it’s important to have a folder to store all helper classes that will support our testing needs. For that reason, I created a helper folder with baseClass.js that will implement common methods for all other classes such as:
- Check API response status code
- Get result object
Create Resource Object Models
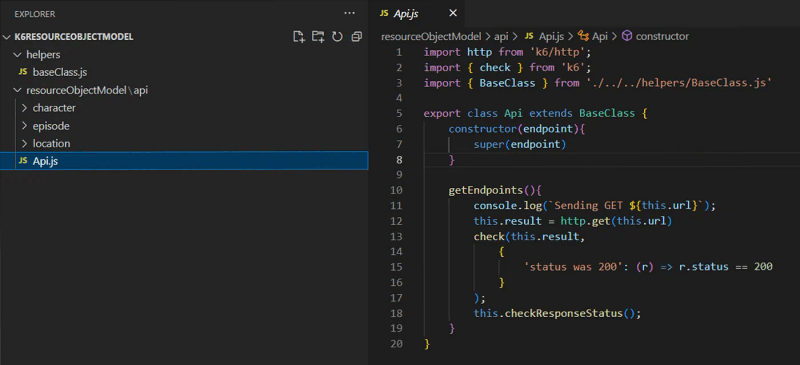
Now it’s time to create resource object models. The first one is “get all resource endpoints”.
GET https://rickandmortyapi.com/api
This resource only implements the GET method, and our resource class should only implement getEndpoints() method.
In cases where we have multiple methods implemented on the same resource, such as POST, PUT, DELETE, and others, we will not create any new classes but add them as methods to the existing resource object with the corresponding logic implemented.
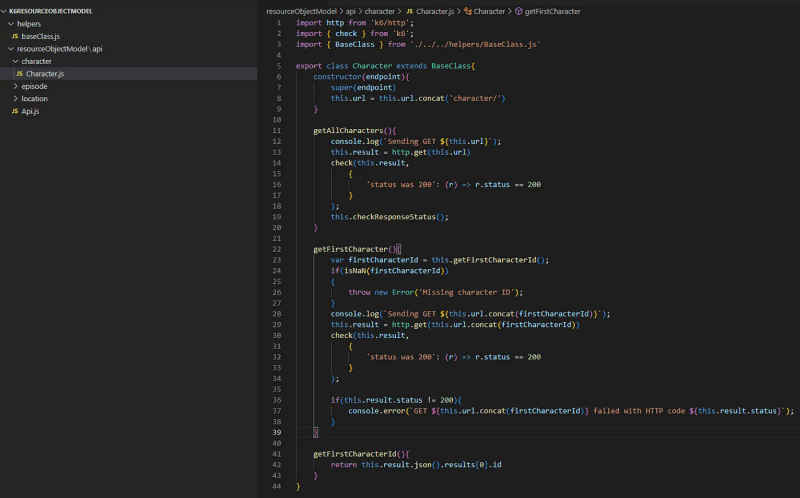
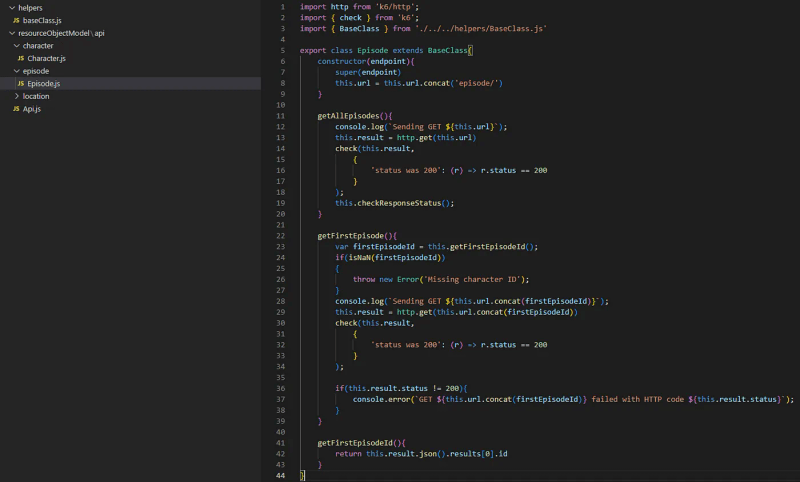
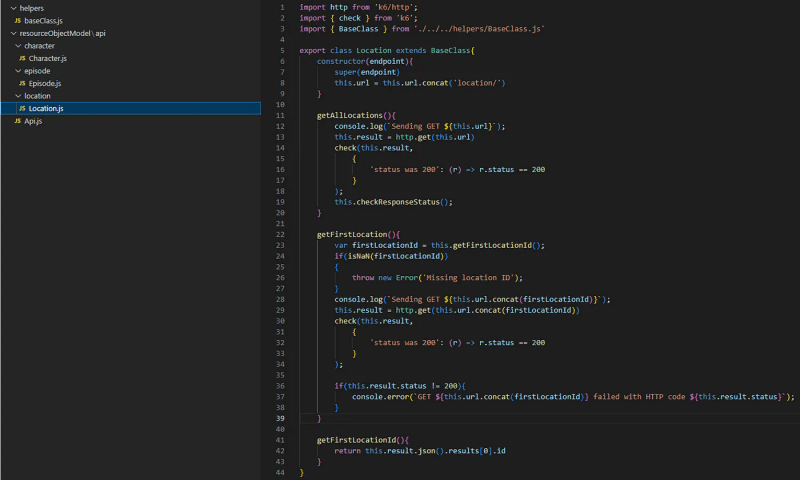
Following the same logic, now we can create and implement other resources as well.
GET https://rickandmortyapi.com/api/character
GET https://rickandmortyapi.com/api/episode
GET https://rickandmortyapi.com/api/location
What next?
So far, so good. We created a solid foundation for our load testing project. To complete our mission of a simple and reusable testing framework, we need to pay attention to a few more things: testing options (test scenarios) and a test environment setup for on-demand script execution. In my opinion, we can put it within a single config file.
TestConfig JSON has two properties: testScenario for executor and scenario setup and environment for environment URLs and other environment-related settings or capabilities.
Building our first ROM test
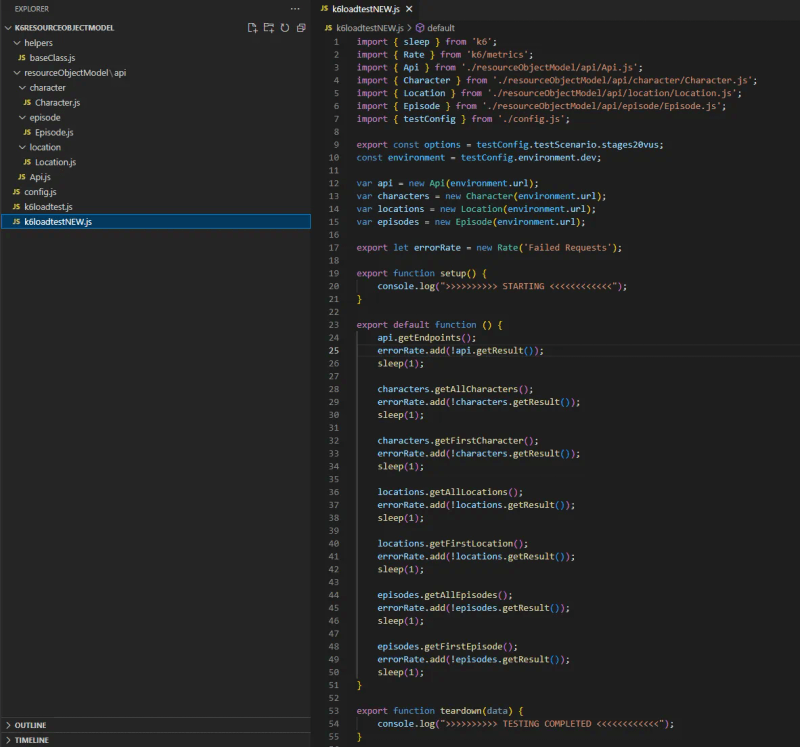
At the beginning of this blog post, I showed the test created in an old-fashioned way. Now, we have all the missing pieces to create a new test out of reusable ROM objects. Check out the new test in the screenshot below.
At the beginning of the test, we set an option value out of our config.js file properties. I find this very useful because IntelliSense gives us the option to choose from previously configured test scenarios. The same logic applies to the environment setup.
After the setup of initial options and the environment, we create instances of our ROM whose methods we call in default function. Looks good, right? And the best thing is the fact that the test has a unique set-it-and-forget-it look.
Simplicity is the key
In the end, my intuition about Resource Object Model was correct, and opting for simplicity over complexity led to more optimized load testing. I’m sure that there are even better ways to achieve the same level of maintainability and reusability and I’m looking forward to hearing from you. At the end of the day, it’s important to continuously work on improving our work and way of thinking.
Until next time, happy testing!
