📖What you will learn
- How to connect your GitHub account with your Jenkins setup
- How to integrate your GitHub projects in your Jenkins setup
This tutorial will walk you through how to add your GitHub Credentials to Jenkins. These instructions might be your first step to integrate Load testing with Jenkins.
What will you need to get started? Firstly, you will need some hardware to run Jenkins on. Virtual hardware is as good as any, so boot up quickly on your favorite cloud hosting provider. It doesn’t have to be a monster machine, a CPU core or two with 2 GB of RAM will get you quite far for smaller projects.
If you intend to use Jenkins for larger projects and/or intend to have several builds running simultaneously, you will obviously want to crank up the hardware accordingly.
The amount of disk space you will need is very much dependent on the project you are working on. But here’s a few key things to remember:
- By default, Jenkins will save all builds of your project, so make sure you have enough room for plenty of builds.
- Then add a couple of GB for your favorite OS as well as Jenkins itself.
- Finally, add a few more for good measure. It’s never fun to have builds fail because of a full disk. Bear in mind that some plug-ins can use a fair share of disk space as well.
Installing Jenkins and Git Plugins
The Jenkins software itself is a web based java application. Installing it is pretty easy thanks to all the different packages provided by Jenkins for almost all major operating systems. And if you’re already running an application server, a web application archive is provided as well.
Several package repositories are available too, making it a breeze to keep your installation up to date. If you, like me, are on a Debian based Linux flavor, installation is as follows:
Alternatively, you can deploy Jenkins via Docker:
You can also install and manage Jenkins on cloud platforms such as Google Cloud, Azure and AWS.
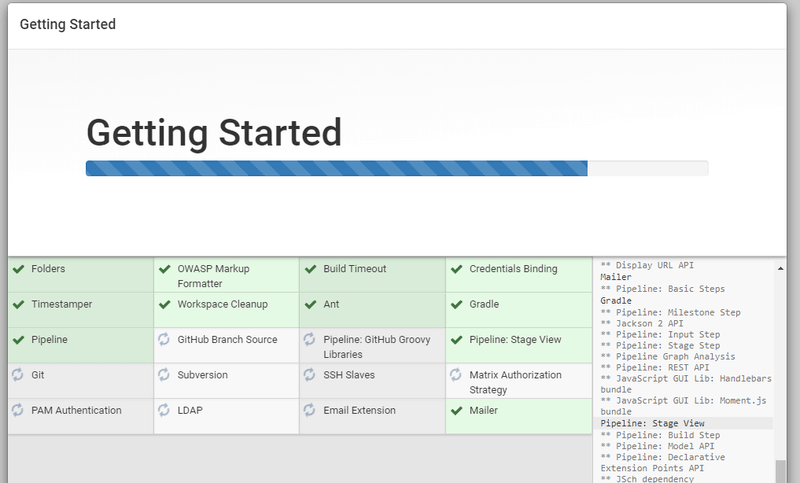
During the installation process, you'll be prompted to install "Suggested Plugins". Choose that option, this should install the necessary plugins required to integrate with GitHub.
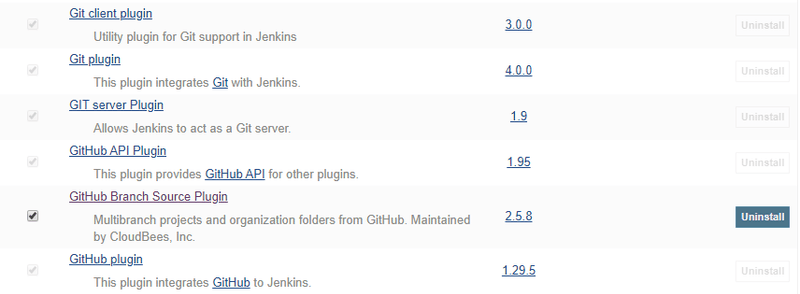
If you had already installed Jenkins, you need to first access the plugin manager via Manage Jenkins > Manage Plugins menu. Check if the GitHub Branch Source plugin has been installed. If not, install it.
Setting up GitHub Credentials on Jenkins
We can use either HTTPS or SSH GitHub credentials. However, for private repositories, SSH credentials are required. Below are the steps for the two different methods:
Method 1: Implementing HTTPS GitHub Credentials in Jenkins
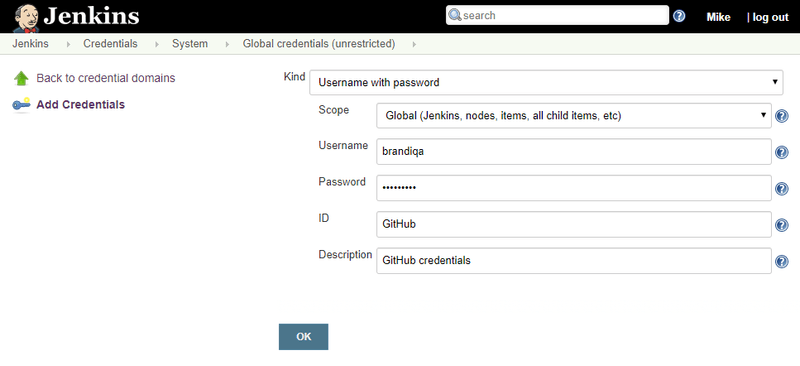
Go to "Credentials" -> "System" -> "Global credentials" and then click the "Add Credentials" link. Place in your GitHub credentials. Click "Save"when done.
Method 2: Implementing SSH GitHub Credentials in Jenkins
If you wish to work with private repositories, you'll need to use SSH credentials. First, generate a new SSH key:
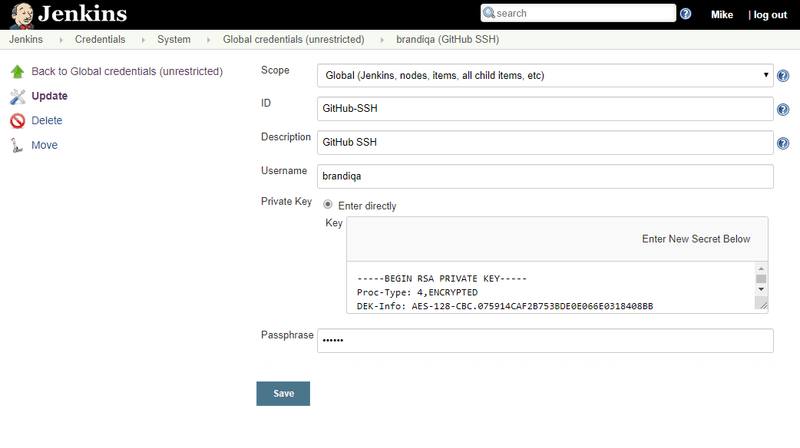
Next go to "Credentials" -> "System" -> "Global credentials" -> "Add Credentials". Under the "Kind" field, click the drop-down and select "SSH Username with private key". Provide your username, private key and passphrase as follows:
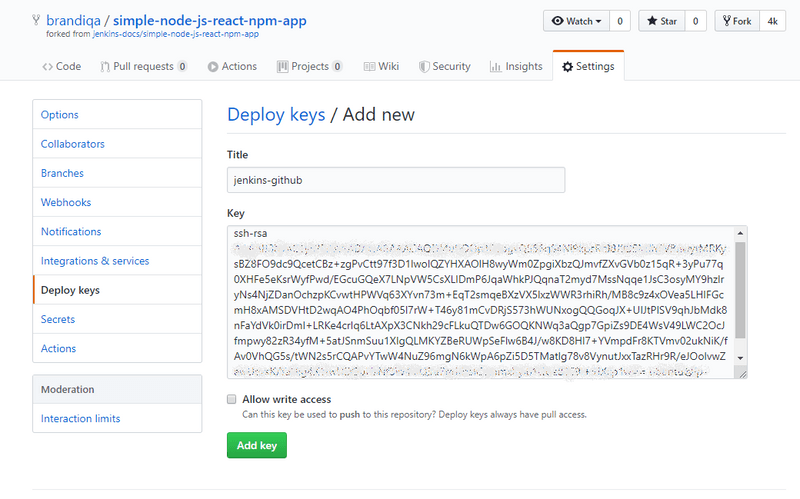
Click the save button when done. Next, you will need to upload your deploy key to your GitHub account. This can only be done on a per repository basis. Simply open the repository you want to work with and open the "Deploy keys" tab. Fill in as follows:
The deploy key will only have read-only access which is enough permissions for Jenkins to clone and pull. With that set, let's proceed with setting up a GitHub project in Jenkins.
Integrating GitHub Projects in Jenkins
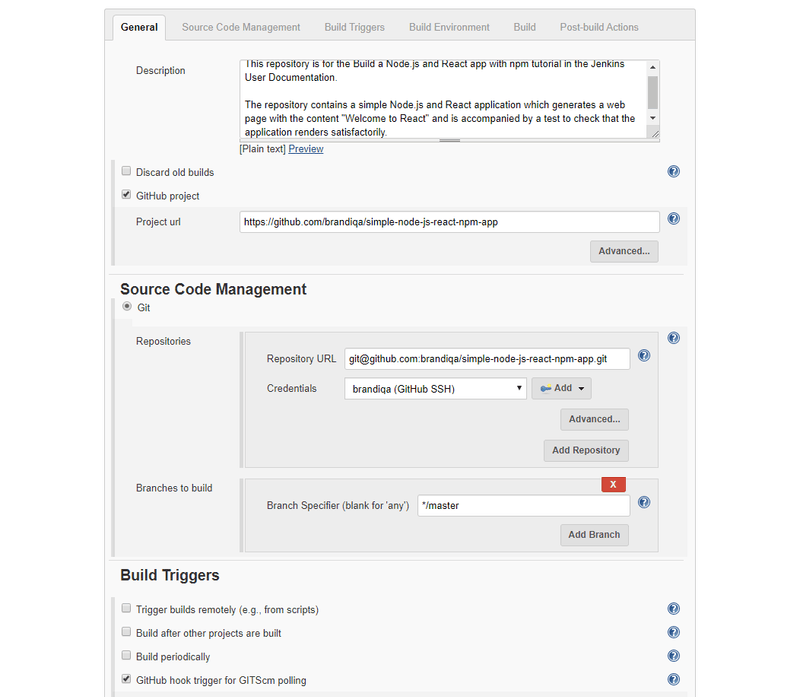
Now that we have successfully added GitHub credentials to our GitHub server, it's time to setup a project. Simply create a new free style project and call it whatever you want. Hit the OK button, then fill in the details as follows:
Select the credential you setup earlier. Add the appropriate GitHub repo URL depending on the type of GitHub credential you setup.
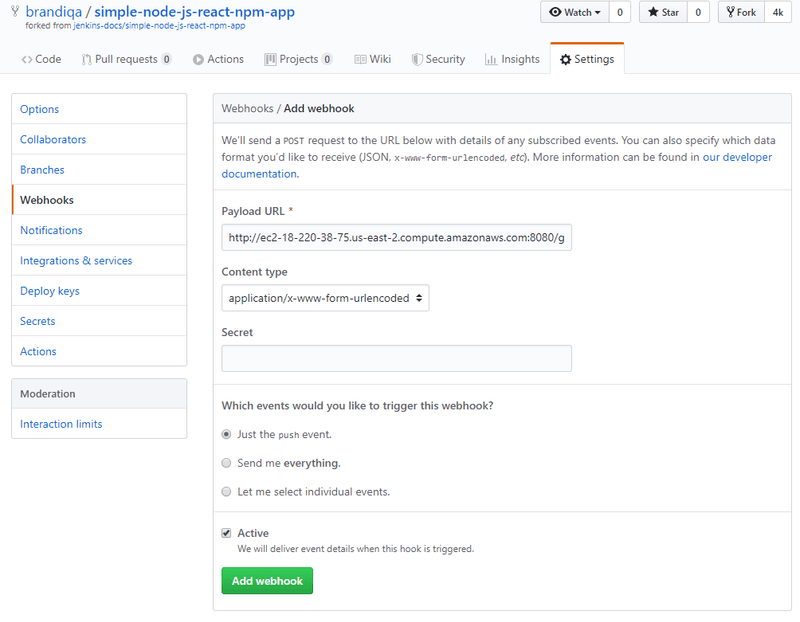
Next, you will need to setup a GitHub webhook that will trigger Jenkin's builds every time you push new code to the repo. The Payload URL needs to be in the format:
<public url>:8080/github-webhook
If you don't have a domain URL, you can simply use a public IP address assigned to your network.
Now for the fun part! Push some new code to your repo and watch Jenkins build your project without your intervention.
Summary
Congratulations, your first step in your continuous integration pipeline is now completed!
As a next step we suggest setting up Load testing with Jenkins in your pipeline in order to test the performance of the website/application you are building.
