⭐️ SAML SSO is available on Enterprise plans.
Microsoft's Active Directory has been a long time the standard for managing an enterprise's users and their access permissions, and Azure Active Directory is its direct cloud counterpart. k6 Cloud integrates with Azure AD to provide organizations with a compliant way to handle on- and offboarding of team members to the service.
On this page, you can read:
- A quick table reference of the necessary fields to configure Azure AD as an IDP
- Detailed steps, with screenshots, of the entire procedure
Prerequisites
To setup Azure AD SAML SSO based authentication to k6 Cloud you must have:
- An Enterprise plan or a plan with the SAML SSO add-on.
- An Azure AD Premium Subscription.
Azure Active Directory
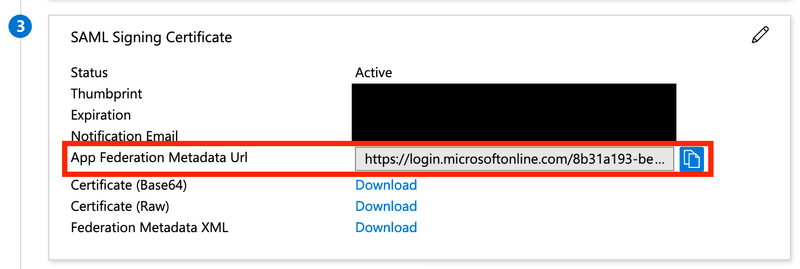
To find the IdP metadata URL needed by the k6 customer support team, find the Single sign-on menu for your Azure AD application. Copy the SAML Certificates > App Federation Metadata Url field.
Azure settings are modified from the Single sign-on sidebar menu for your Azure k6 cloud application.
Basic SAML Configuration
| Attribute | Value |
|---|---|
| Identifier (Entity ID) | https://api.k6.io/sso/acs/ |
| Reply URL (Assertion Consumer Service URL) | https://api.k6.io/sso/acs/ |
| Sign on URL | Optional |
| Relay State (Optional) | Optional |
| Logout Url (Optional) | https://api.k6.io/sso/acs/logout |
Attributes and claims
These are required.
| Attribute | Value |
|---|---|
| user.first_name | user.givenname |
| user.last_name | user.surname |
| user.email | user.userprincipalname |
| user.username | user.userprincipalname |
| token | <TOKEN-YOU-GET-FROM-K6-SUPPORT> |
| Unique User Identifier | user.userprincipalname |
Additional attributes and claims
This is optional. If not given, all users will end up starting in the k6 Organization's default Project(s) or Team(s) (configurable from the app, see next section).
Setting Azure up to send Group attributes, allows for more powerful mapping of Azure Groups to k6 cloud Teams/Projects. Whatever you choose to add here, you must communicate it to the k6 customer success team so they can set it the matching mapping on the k6 cloud side.
| Attribute | Value |
|---|---|
| department | user.groups |
(It doesn't matter what the Attribute is called, as long as you tell us what you chose). Azure AD sends "Group Object IDs", so if you are a member of three groups, the data k6 receives would look like this:
k6 won't know which Azure Group each ID corresponds to. So you need to check the Users and Groups for your Azure application and figure out the Object Id for each Group. You then need to send to send the k6 customer support a mapping like this:
| Azure Group Object ID | Team /Project name to use on the k6 side |
|---|---|
| "6663s5-234f20342-c232ad1-8dwsr2356" | "Backend" |
| "114fs5-664f20543-b612bd3-s7sr23c88" | "Frontend" |
| "57f6sa-28ab52112-a25sc85-abc2aa223" | "ProjectX" |
The k6 cloud support team will then map the Group IDs to your Teams on the k6 cloud side.
Add Azure AD as an IdP
This procedure covers the same material of the previous sections, but adds granular detail:
Navigate to https://portal.azure.com/.
Log in to Azure Portal and go to Azure Active Directory tab.
Select the Enterprise applications service.
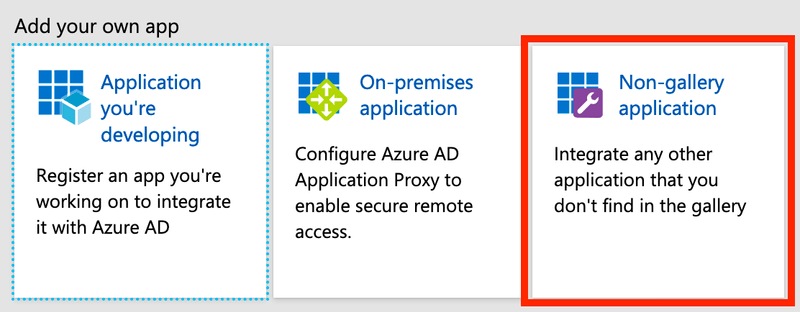
Click on the New application button.
Give the application a name, e.g. k6 Cloud.
Click Add.
When your application has successfully been added, click Set up single sign on (or the equivalent "Single sign-on" link in the left menu):

Edit Basic SAML Configuration:

Setting:
Property Value Identifier (Entity ID) https://api.k6.io/sso/acs/ Reply URL (Assertion Consumer Service URL) https://api.k6.io/sso/acs/ Logout Url https://app.k6.io/account/logout Edit User Attributes & Claims:

Setting the following user attributes (and clearing the "Namespace" property for each attribute):
Attribute Value Unique User Identifier user.userprincipalname user.email user.userprincipalname user.username user.userprincipalname user.first_name user.givenname user.last_name user.surname token An unique token that you'll be provided with by the k6 Cloud support team. Copy the "App Federation Metadata Url" and send it to k6 Cloud support for completion of the setup.
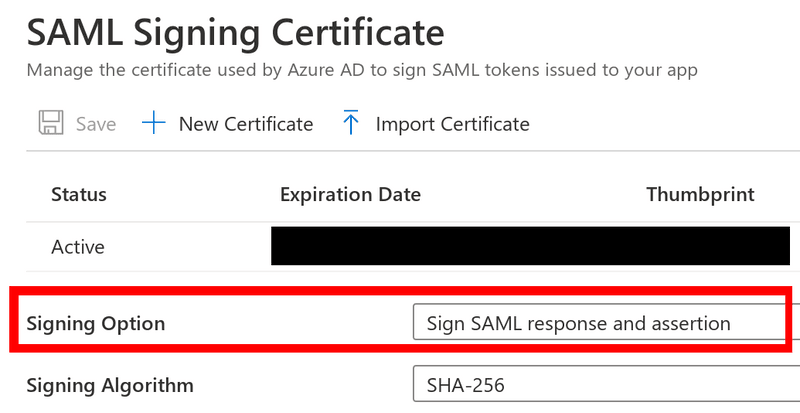
Also, edit SAML Signing Certificate and set the "Signing option" to "Sign SAML response and assertion":
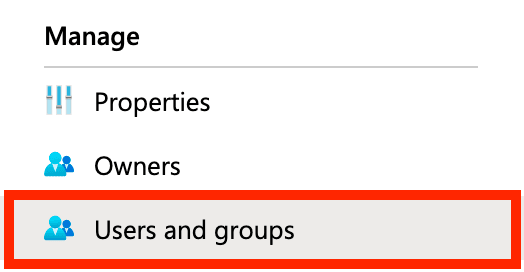
Before moving to the final step of testing the integration, make sure you've added the appropriate users and groups to the application in Azure AD:
Once you've gotten confirmation from k6 Cloud support that your account is ready we advise you to test the integration by clicking the "Test" button in Azure AD:

Teams setup
Take the following steps to enable mapping of Azure Active Directory groups with k6 Cloud projects:
- Navigate to https://portal.azure.com/.
- Log in to Azure Portal and go to Azure Active Directory tab.
- In the right pane, click on the Groups menu item.
- Click on the New Group button.
- Choose Security as the group type and choose a name for the group.
- Click on the No owners selected and choose the group owner (usually the administrator).
- Click on the No members selected and choose members of this group and click on Select when you're done.
- Click on Create when you've done setting up your group. You'll be redirected back to the Groups page, and after a few seconds, your group will be created.
- Go to your k6 Cloud enterprise application. To do so, search for Enterprise Applications in the top search bar.
- Click on the Users and groups in the right pane, and you'll be presented with the list of users and groups assigned to your k6 Cloud application.
- Click on the Add user/group, choose the newly created group, and click on Assign. This application is now assigned to all the members of that group. You can assign as many groups as you want to your k6 Cloud application. The group members will be later assigned to their projects on k6 Cloud.
- Now click on the Single sign-on option in the right pane. In the Attributes & Claims section, click on Edit on the frame top right corner.
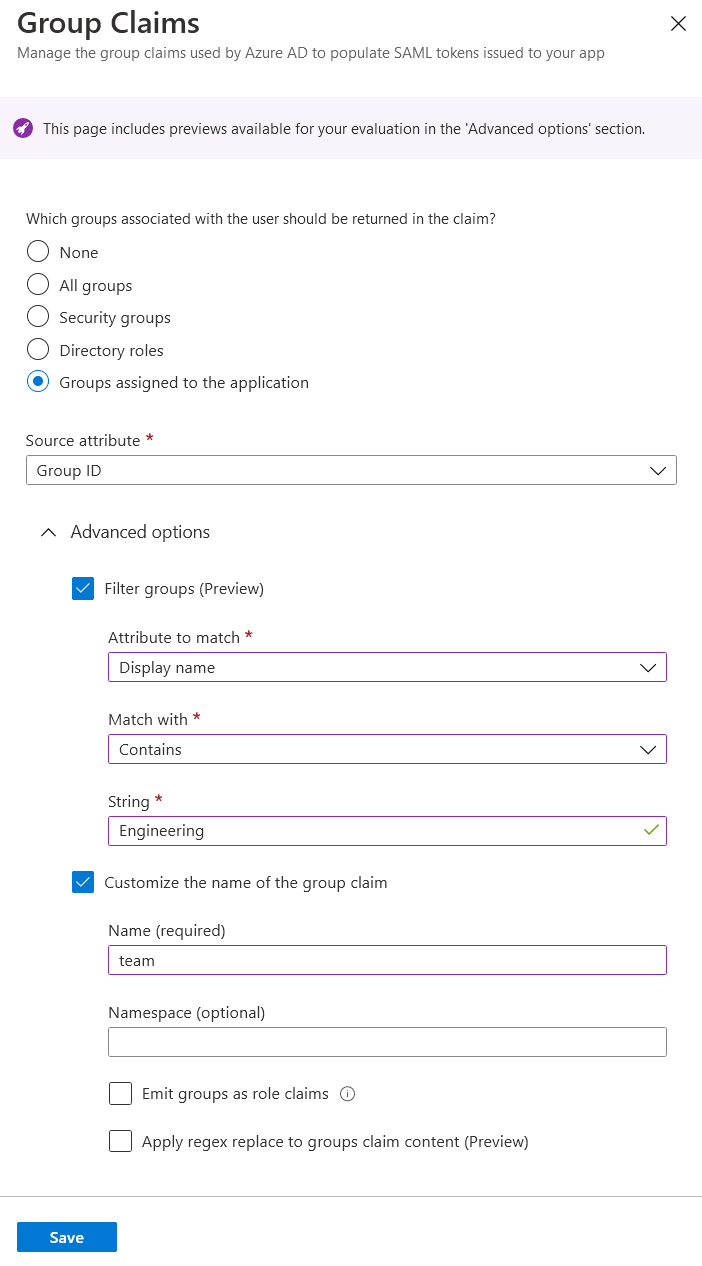
- Click on the Add a group claim and add a group claim as shown below:
- You've successfully set up teams on your end. Inform your point of contact about the object id of each group and the list of projects on k6 Cloud you want the users from those groups to land on. You can retrieve the object id of the group by navigating to your Azure Active Directory and then clicking on Groups in the right pane. The list of groups and their object ids will be shown.
